On Windows systems, whenever any file is deleted it will be automatically moved to the Recycle Bin. Hence, there is a chance to restore accidentally deleted files into their original locations. Recycle Bin is very helpful to restore accidentally deleted files due to the availability of this feature. But when you apply Shift-Delete on the files, it will not be directed to the Recycle Bin folder. The files will be permanently deleted from the computer drive. So, if you accidentally use the Shift-Delete on the vital files, then you will lose them and it can't be restored from the Windows Recycle Bin. Hence, you should always be careful whilst using the shift-delete combinations or it will lead to major data loss.
Are the shift-deleted files permanently deleted from the computer?
Files deleted using the Shift + Delete keys combination will bypass the Recycle Bin folder. Well, when files are deleted from the system, such deleted file content will remain in the same location. The computer will not delete actual content that is present in the file. The file pointer will get deleted but the deleted data remains intact. but the drive space will be marked as available to save new files. So, if you continue with any write operation, the recoverable files might get overwritten and recovery becomes impossible. Therefore, one should stop using the system further and start to get off permanently deleted files using the Recycle Bin Recovery Software.
The best tool to retrieve Shift-Deleted files on Windows
Recover Recycle Bin software can be utilized to get off data from external HDD, USB flash drive, memory stick, memory cards, and iPods. It is also capable to restore more than 300 file types that include- Word files, audio files, video files, image files, and other media files. The tool can be installed on any edition of Windows OS- Windows 8, Windows 10, Windows 7, Windows XP, Windows Vista, Server 2008, and Server 2003.
Easy steps to recover deleted files using Recycle Bin Recovery software
- Download Recover Recycle Bin software to recover the deleted file and install it in your system. Make sure that you are not installing the software in the same drive from where you want to recover deleted data.
- Log in to your Windows PC as Local System Administrator to install the software
- Check all the system requirements before running the software and make sure that you are meeting all necessary hardware and other system requirements.
How to recover files deleted after Shift-Delete?
Step 1: Run the Recover Recycle Bin software on your computer.
Step 2: Choose the Recover Files option on the main screen.
Step 3: Browse the drive from where the files got permanently deleted. Then click on the Scan button.
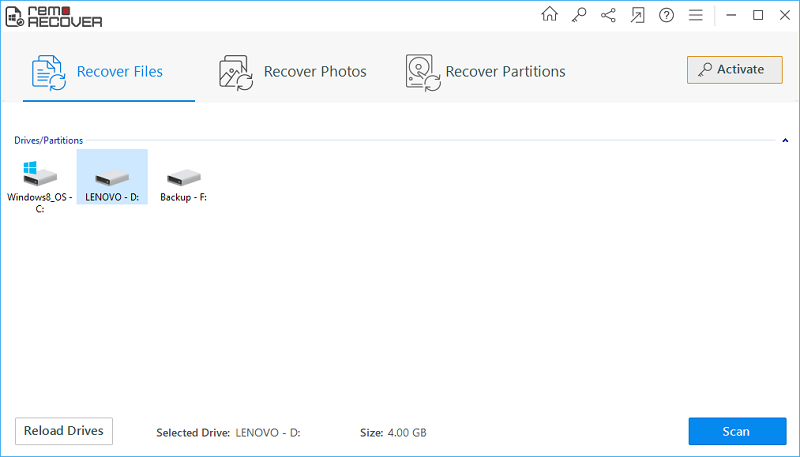
Fig A: Main Window
Step 4: Allow the software to completely scan the selected drive.
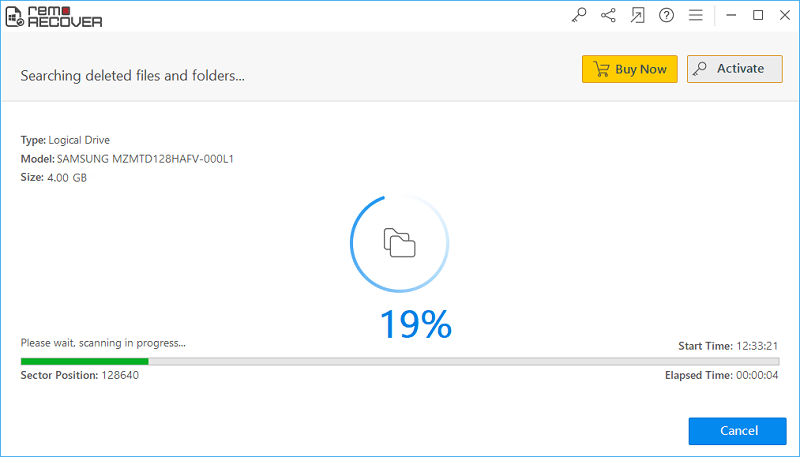
Fig B: Scanning in Progress
Step 5: The recovery results appear in Data View and File Type View layouts.
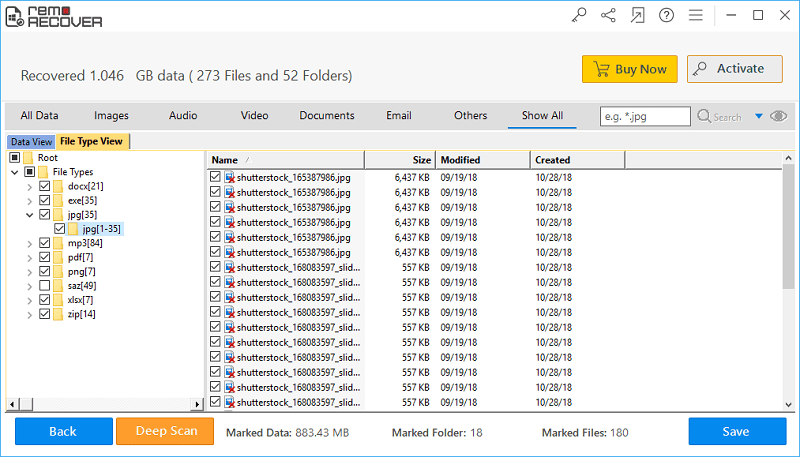
Fig C: List of Restored Files
Step 6: Preview the file items and mark them for saving.
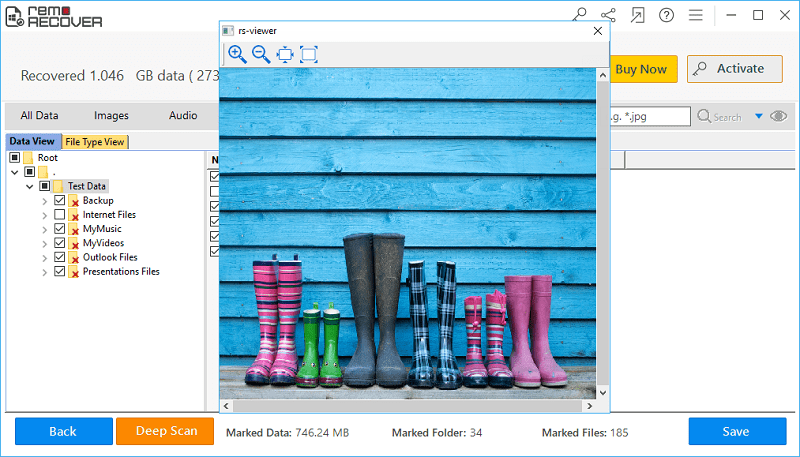
Fig D: Preview Recovered Files
Step 7: Mention the drive location to save the recovered files.
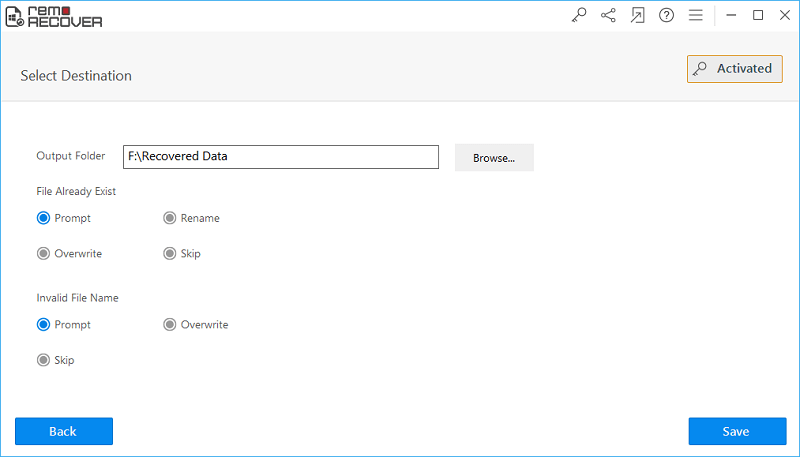
Fig E: Save the Recovered Data