How to Recover Files Emptied from Recycle Bin Windows 10?
Let's consider a situation wherein your Windows 10 OS doesn't have enough memory space. So to get free up space on Windows 10 hard drive, you empty the Recycle Bin without verifying the folder contents. Later you realize that the emptied folder contained some vital files in Windows 10. It seems like the files got permanently deleted.
Reasons behind data loss from Windows 10:
- While you are deleting unnecessary files from the Windows 10 system, you may accidentally delete some vital files from it and also emptied the Recycle Bin folder
- Performing deletion via Shift + Delete key combination bypasses the Recycle Bin
- Corruption of the recycle bin folder
- Deletion of the files that are too large for the recycle bin folder
- Executing the del command on the Windows command prompt
Though files remain inaccessible after emptying the recycle bin on Windows 10, the deleted files remain intact internally in the hard disk storage. Retrieval of the permanently deleted files from the recycle bin by making use of the Recycle Bin Restoration Software.
How to Recover Files Emptied from the Recycle Bin Windows 10?
When you empty the recycle bin folder, all the file items in it still reside on the hard drive. The Windows system marks the space as free to save new files. But if you have saved any new files then the space occupied by old files will be overwritten and leads to permanent deletion of files. Nonetheless, the Recover Recycle Bin is powerful enough to extract the deleted data.
Recover Recycle Bin is an excellent utility to regain the files emptied from the Windows 10 recycle bin folder. It serves useful in the restoration of files that got lost or deleted due to various known and unknown factors. This application ensures that original file content and the structure remain unaltered upon recovery. The tool makes use of the unique file signatures to locate the files from the Windows 10 hard disk.
Features of the Recover Recycle Bin Software
- The software has a Preview option which helps in reviewing the recovered files
- Using this software, you can recover deleted files from USB drive, SSD drive, external hard drive, memory cards, iPods, etc.
- The demo version of the app lets the users preview the recoverable file items
- It also allows users to perform a search for particular file items
- Displays the recovered files on the basis of modified date, file creation, size, and file name.
- It supports the recovery of data on all major versions of Windows OS such as Windows 8, Windows 7, Windows Vista, Windows XP, Windows Server 2003/2008, etc.
Steps to Recover Files Emptied from Windows 10 Recycle Bin
Step 1: Install the Recover Recycle Bin software on your Windows 10 system.
Step 2: Opt the Recover Files option on the main screen.
Step 3: Now click on the logical partition that holds the Recycle Bin folder. Click on the Scan icon to continue.
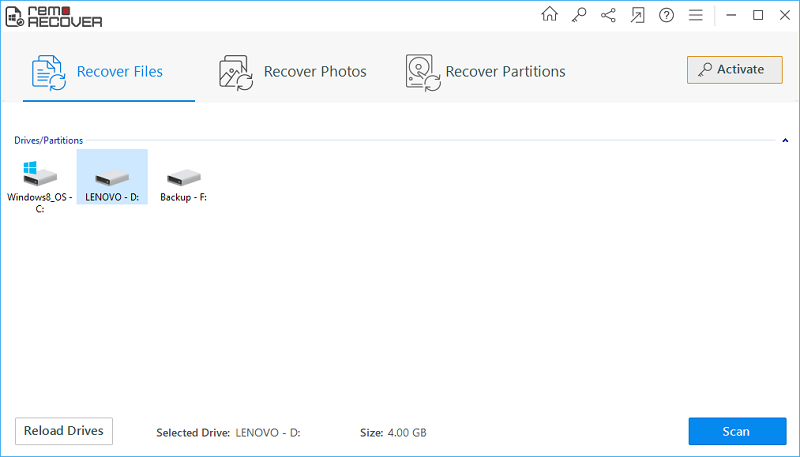
Fig A: Main Window
Step 4: Allow the software to complete the scan on the selected drive.
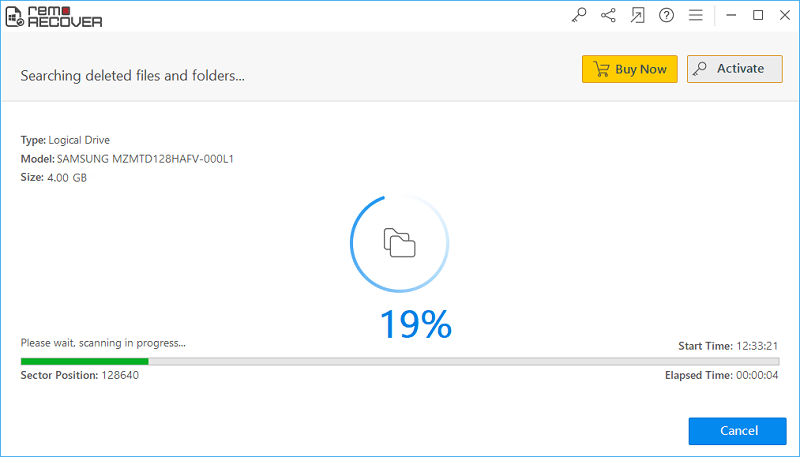
Fig B: Scanning in Progress
Step 5: Now review the regained files under Data View and File Type View layouts.
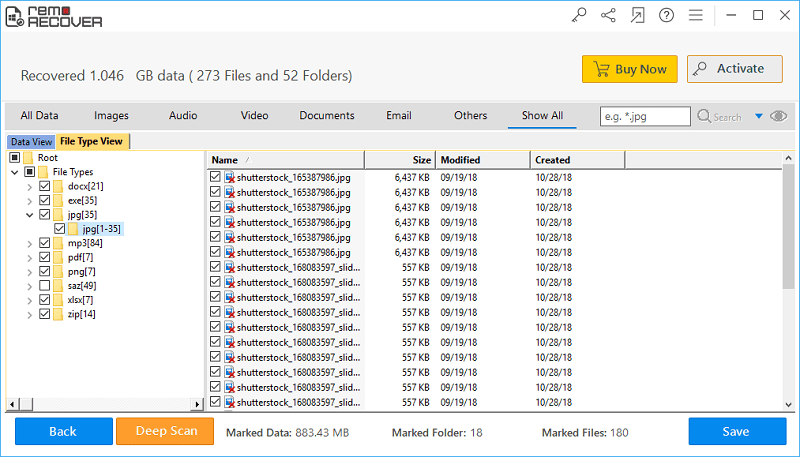
Fig C: List of Restored Files
Step 6: To preview any file item, just right-click on it. Then continue to mark the required files for saving.
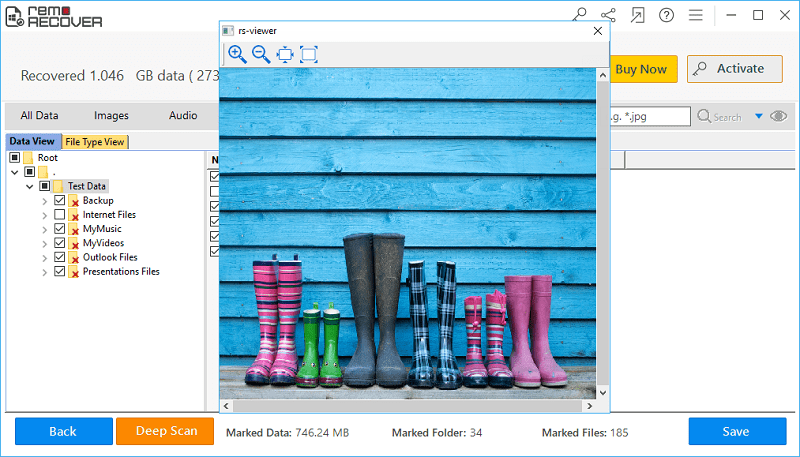
Fig D: Preview Recovered Files
Step 7: Browse the desired file location to save the retrieved files and click on the Save button.
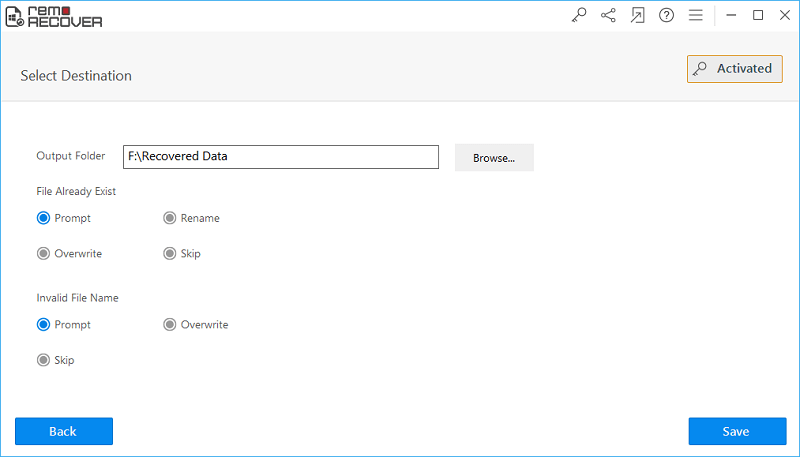
Fig E: Save the Recovered Data