Recycle bin is temporary storage for files and folders that have been deleted intentionally or accidentally by the user. Well, the deleted files are not immediately erased from the hard drive. A recycle bin is a feature, which allows the user to browse deleted files, recover those files and folders that were deleted by mistake, or delete them permanently by emptying the Recycle bin. The Recycle Bin keeps a record of each file, folders and directory's original location. There are certain instances when the recycle bin gets mistakenly emptied or deleted. In such a situation you can use a Recycle Bin Recovery Software to undelete files.
Major reasons for permanent deletion of recycle bin files
- Accidental deletion: You might delete the files by accidentally emptying Recycle bin, or you might be deleting some unwanted files or folders and along with that, you might have deleted valuable files
- Emptied recycle bin folder: The whole recycle bin file items get permanently deleted when the users mistakenly click on the Empty Recycle Bin option
- Shift-Delete operation: If you applied Shift-Delete on the important files instead of some other unwanted files, then it straightaway bypasses the recycle bin folder
- Deletion of large files: The recycle bin gets even bypasses when you delete the file items that are too large for the recycle bin folder
- Virus infection: Dreadful virus and malware also makes the recycle bin items to get deleted or lost
- Corrupt recycle bin folder: The corrupt recycle bin folder also makes the recycle bin file items inaccessible
How to recover files after deletion?
Whenever deletion occurs from the system hard drive, they aren't permanently deleted. These file items still reside in the same location until it gets overwritten. The powerful tools like Recover Recycle Bin software can extract the deleted files in simple clicks.
Recover Recycle Bin folder facilitates users to recover the deleted folder from the Recycle bin, folder in an efficient manner. This award-winning program is capable to restore files after deletion, corruption, formatting, etc. without any hassle. The eminent scan engine fetches the permanently deleted files using its unique file signatures.
Notable features of the Recover Recycle Bin recovery tool-
- Offers easy and secure file recovery process
- Features an option to preview recovered files
- Suitable to recover recycle bin on Windows Vista, XP, 7, 8, 10, etc.
- It is also capable to regain data from various external removable drives
- Supports the restoration of documents, pictures, audio, video, and may more
Read more- Check the detailed steps to perform file recovery after emptying the Recycle Bin folder on Windows 8 PC's.
Steps to recover files after deleting from recycle bin
Step 1: Run the Recover Recycle Bin software on your system.
Step 2: Opt the Recover Files option.
Step 3: Locate the logical drive that is to be scanned for deleted files. Click on the Scan button.
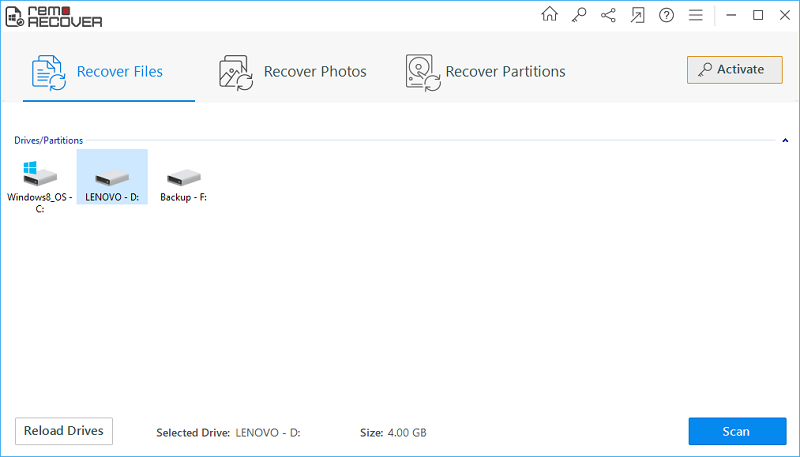
Fig A: Main Window
Step 4: The software begins to completely deep scan the logical drive you selected.
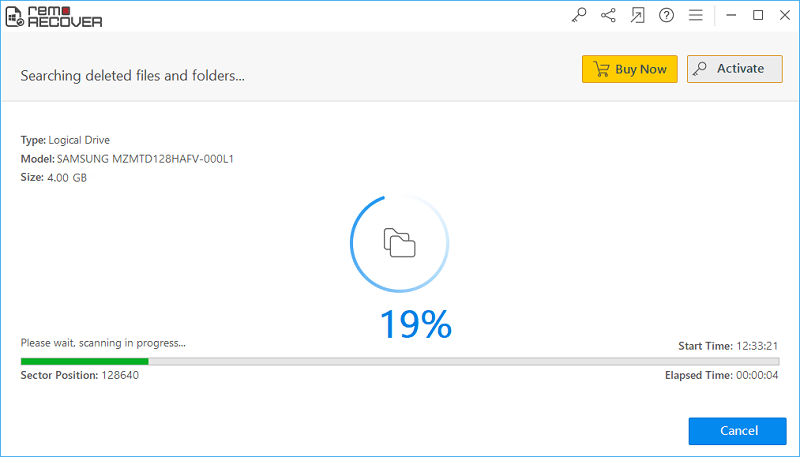
Fig B: Scanning in the Progress
Step 5: Review the scan results using either Data View or File Type View layouts.
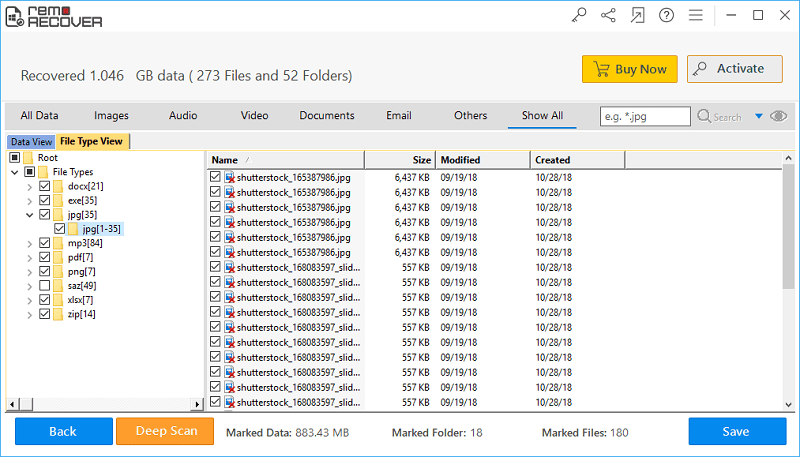
Fig C: List of the Restored Files
Step 6: Confirm the file recovery by previewing the file items. Then continue to mark the required files and folders for saving.
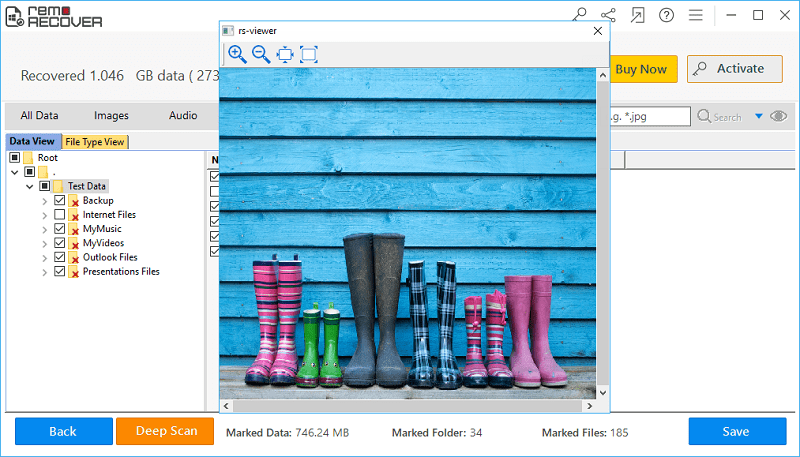
Fig D: Preview Recovered Files
Step 7: Choose an appropriate file location to save the files retrieved from the Windows system. Hit on the Save icon.
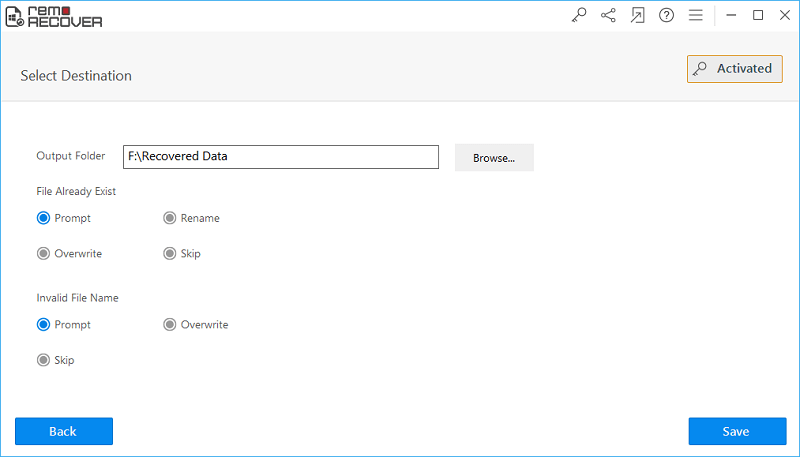
Fig E: Save the Recovered Data